How to Clear Cache in WordPress (Plugins, Host, CDN and Browser)

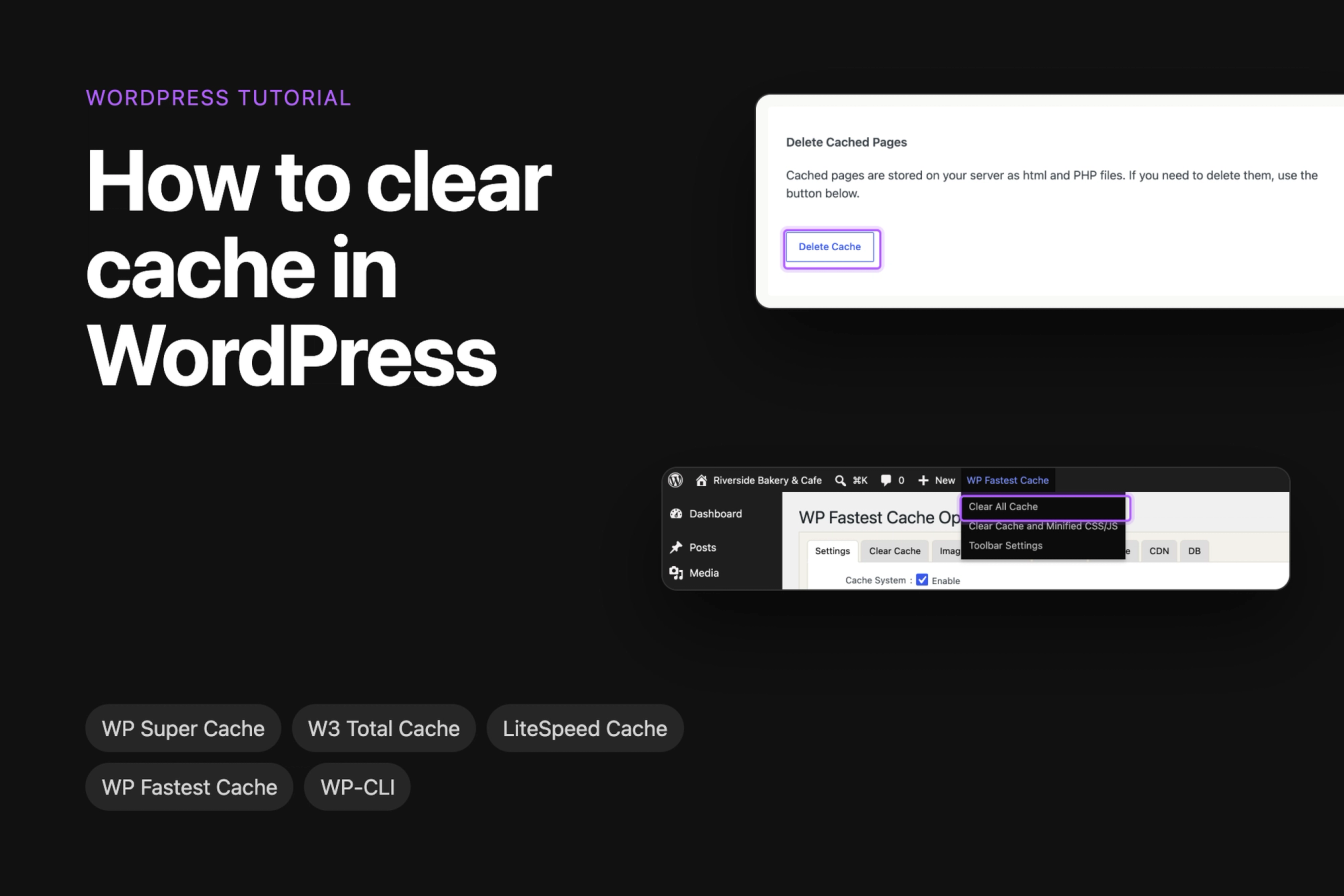
When you change something in WordPress and the live site still shows the old version, a cache is almost always the reason. This guide shows where the clear cache button is in the four most used free caching plugins, and how to clear the caches that sit outside WordPress: your host, Cloudflare and your browser.
Every screenshot comes from a fresh WordPress 7.1 install with WP Super Cache 3.1.3, W3 Total Cache 2.10.6, LiteSpeed Cache 7.9.1 and WP Fastest Cache 1.5.2.
Why don't my changes show up?
A caching plugin saves a finished HTML copy of each page and sends that copy to visitors, so WordPress doesn't have to build the page on every request. Caching plugins can clear a page's copy when you update that page, but changes made elsewhere don't always trigger that.
In our test, we changed the site title under Settings > General. With WP Super Cache, W3 Total Cache and WP Fastest Cache active, logged-out visitors kept seeing the old title until we cleared the cache.
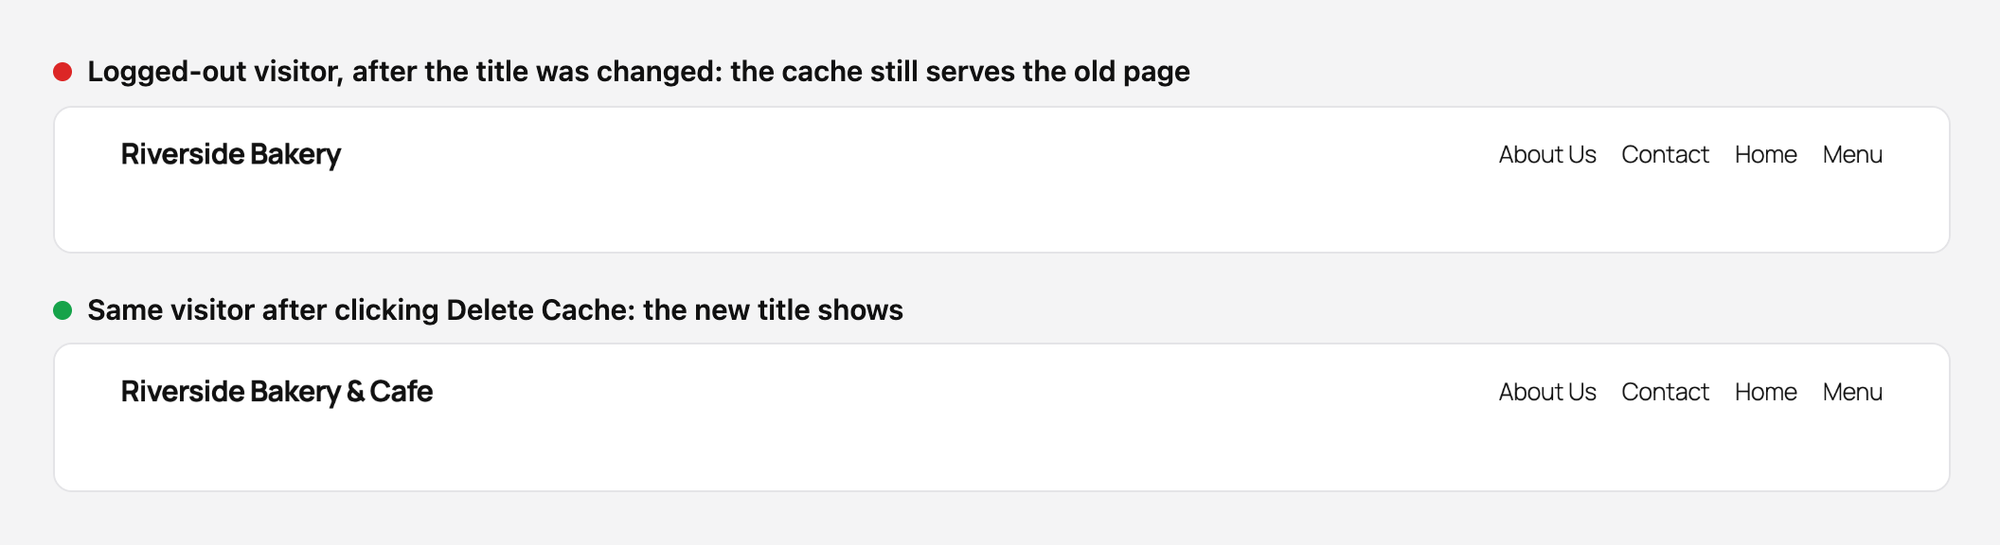
You usually won't notice this while you're logged in, because most caching plugins skip the cache for logged-in users. To see what visitors see, open the page in a private browser window.
Which cache do you need to clear?
A WordPress site can have up to four layers of cache between your change and the visitor:
- the page cache of your caching plugin
- a server cache run by your hosting company
- a CDN such as Cloudflare
- the visitor's own browser
Start with the plugin, since that's the most common cause, then work outwards if the old version still shows.
Clear the cache in WP Super Cache
The fastest way is the Delete Cache link that WP Super Cache adds to the admin bar at the top of every admin screen. Click it and the plugin deletes all cached pages.

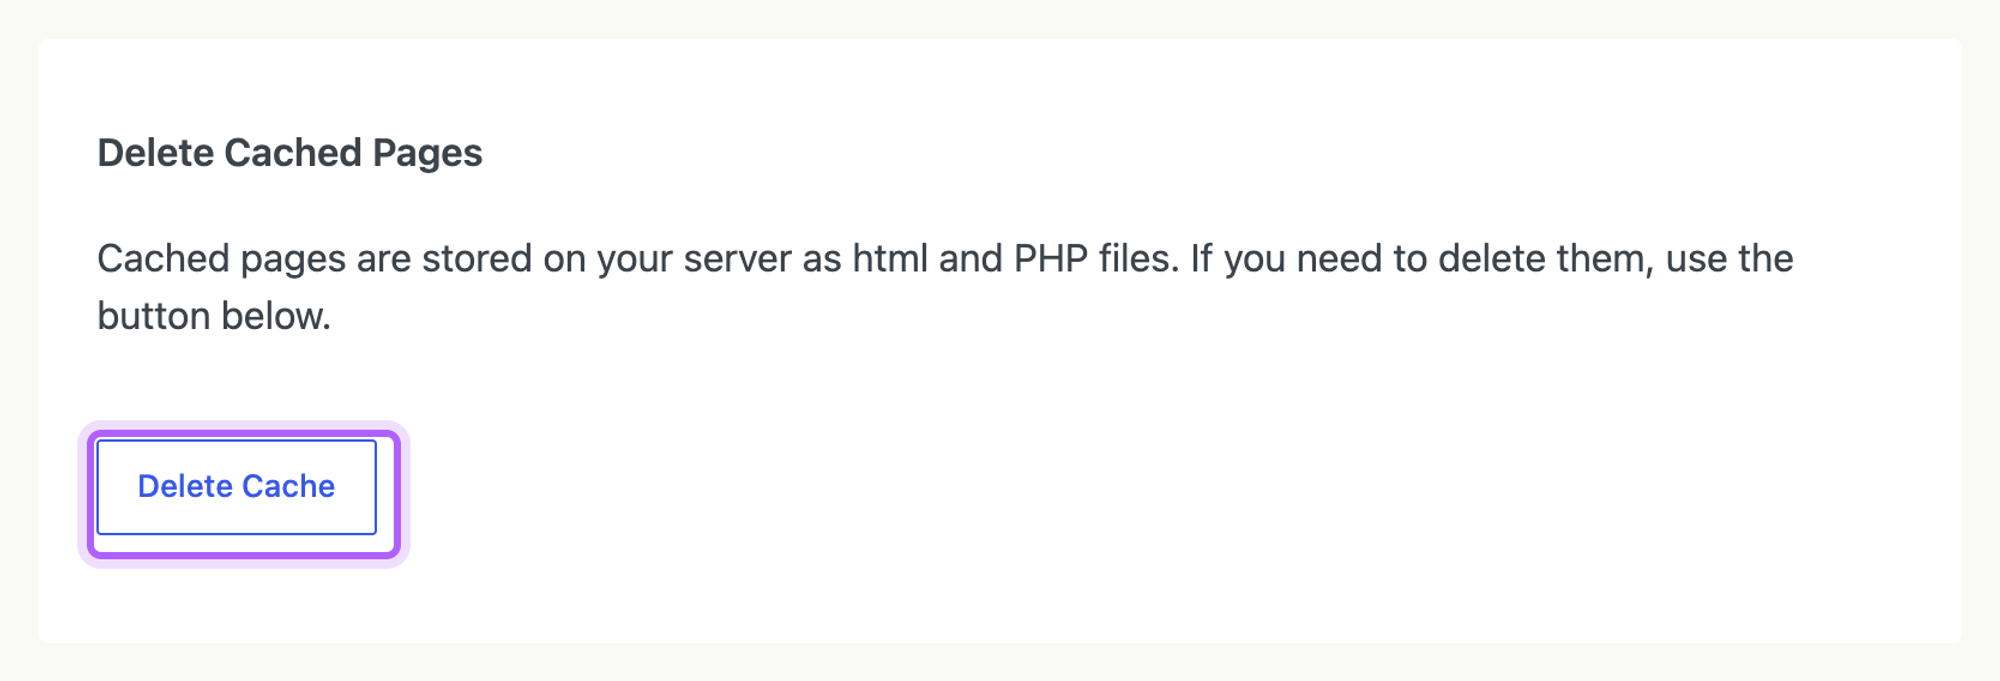
You can do the same from the settings page. Go to Settings > WP Super Cache, stay on the Easy tab and scroll down to Delete Cached Pages, then click Delete Cache.
Clear the cache in W3 Total Cache
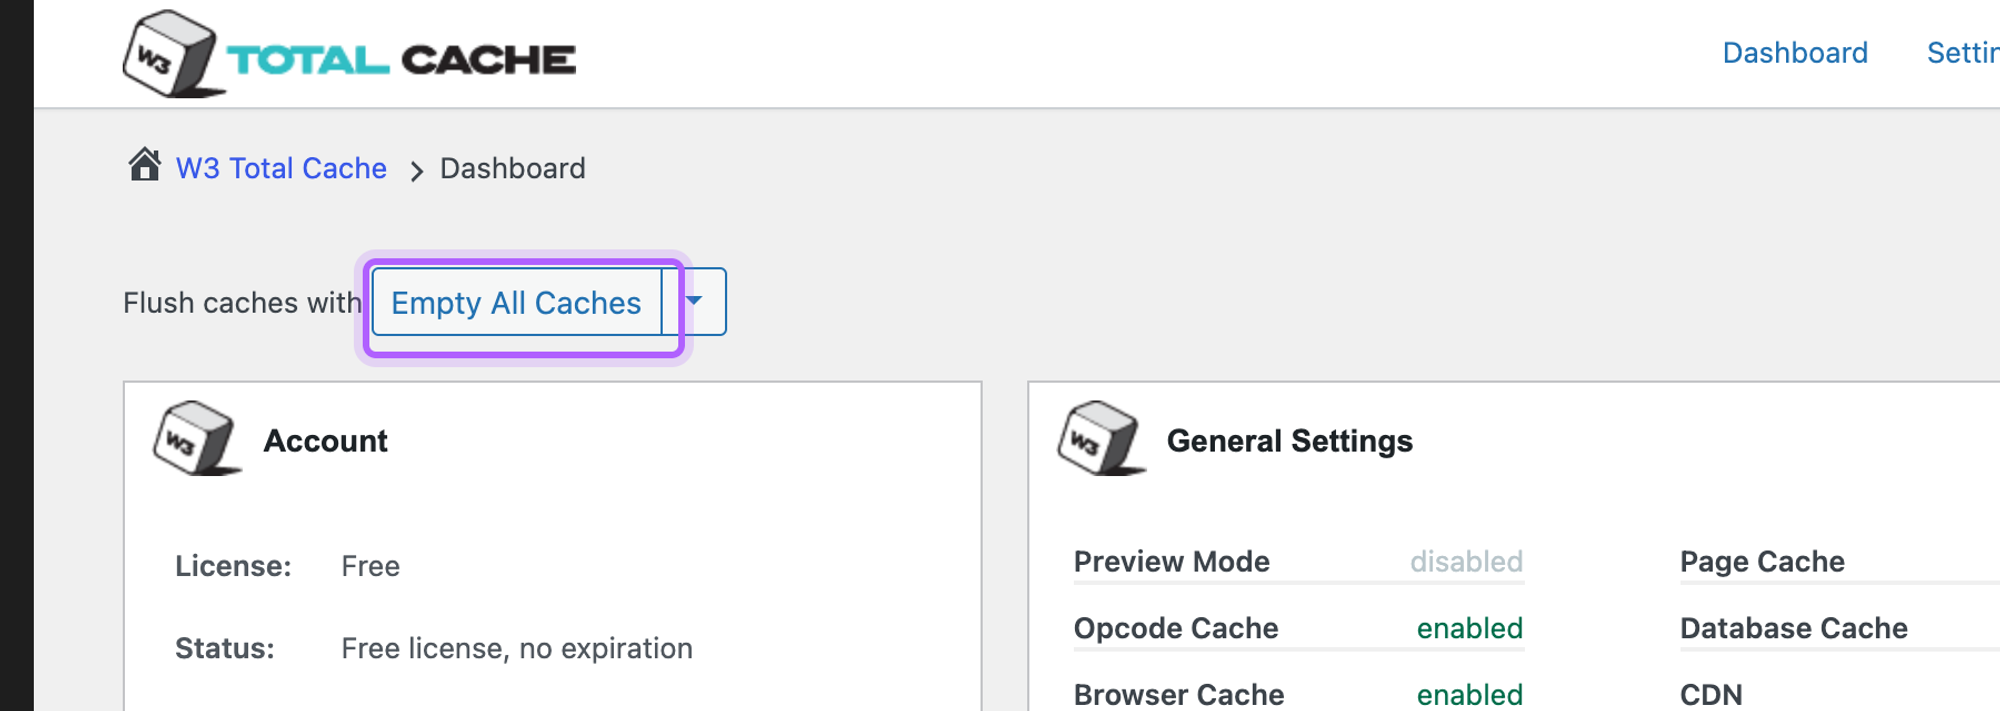
Hover over Performance in the admin bar and click Purge All Caches. This clears the page cache and every other cache W3 Total Cache manages, such as minified files and the database cache.
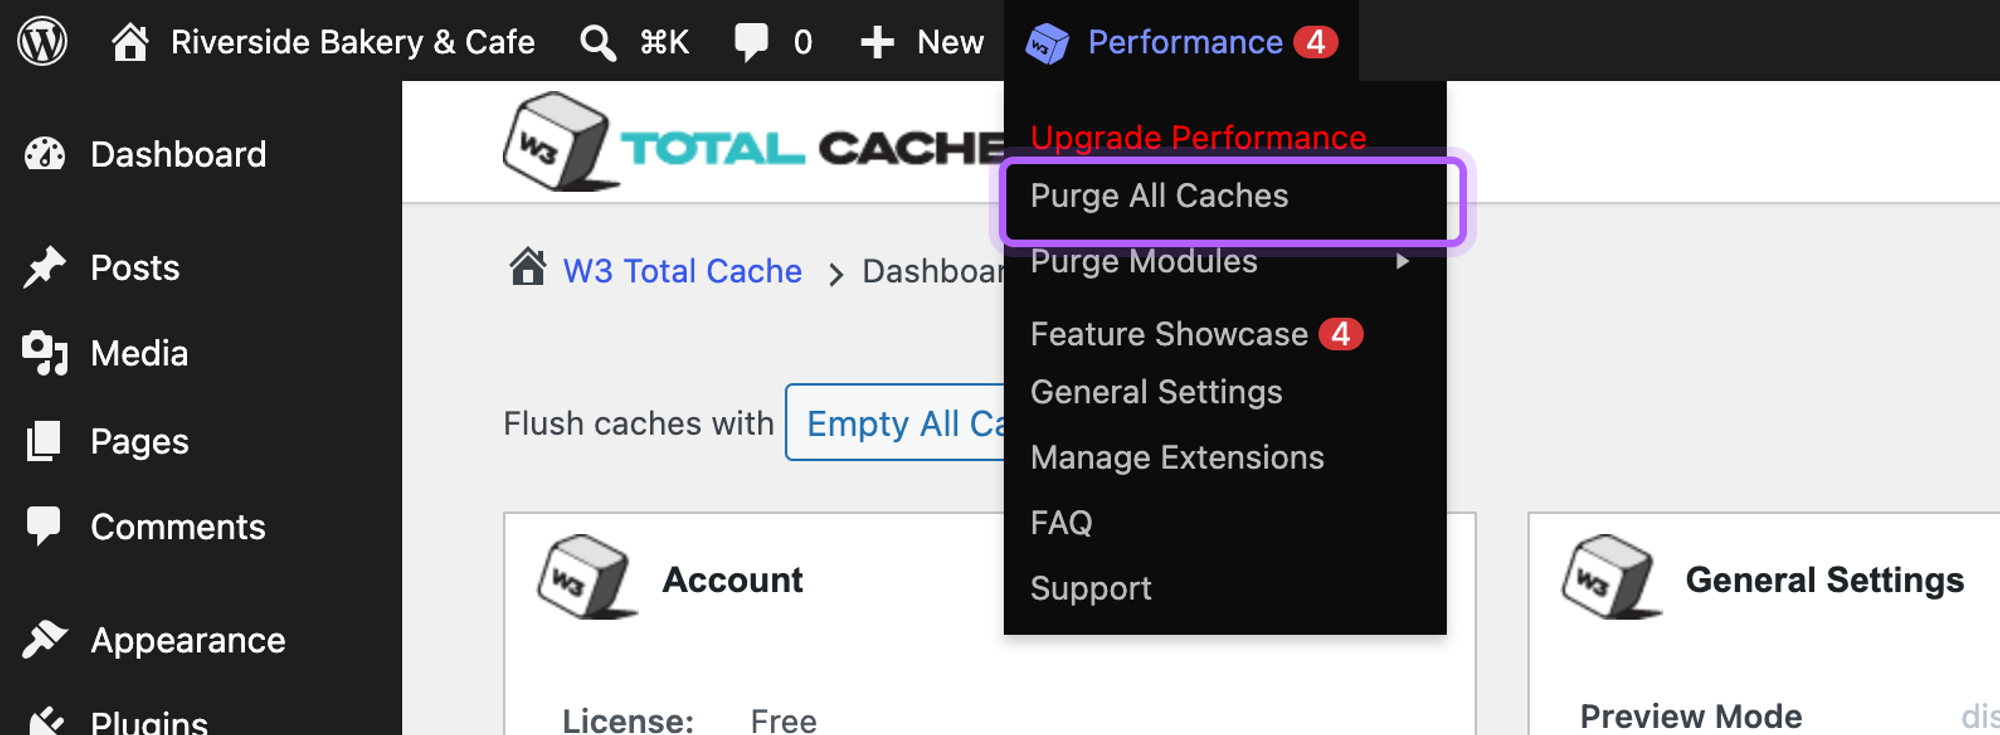
On the W3 Total Cache dashboard under Performance > Dashboard, the same action is the Empty All Caches button next to Flush caches with.
Clear the cache in LiteSpeed Cache
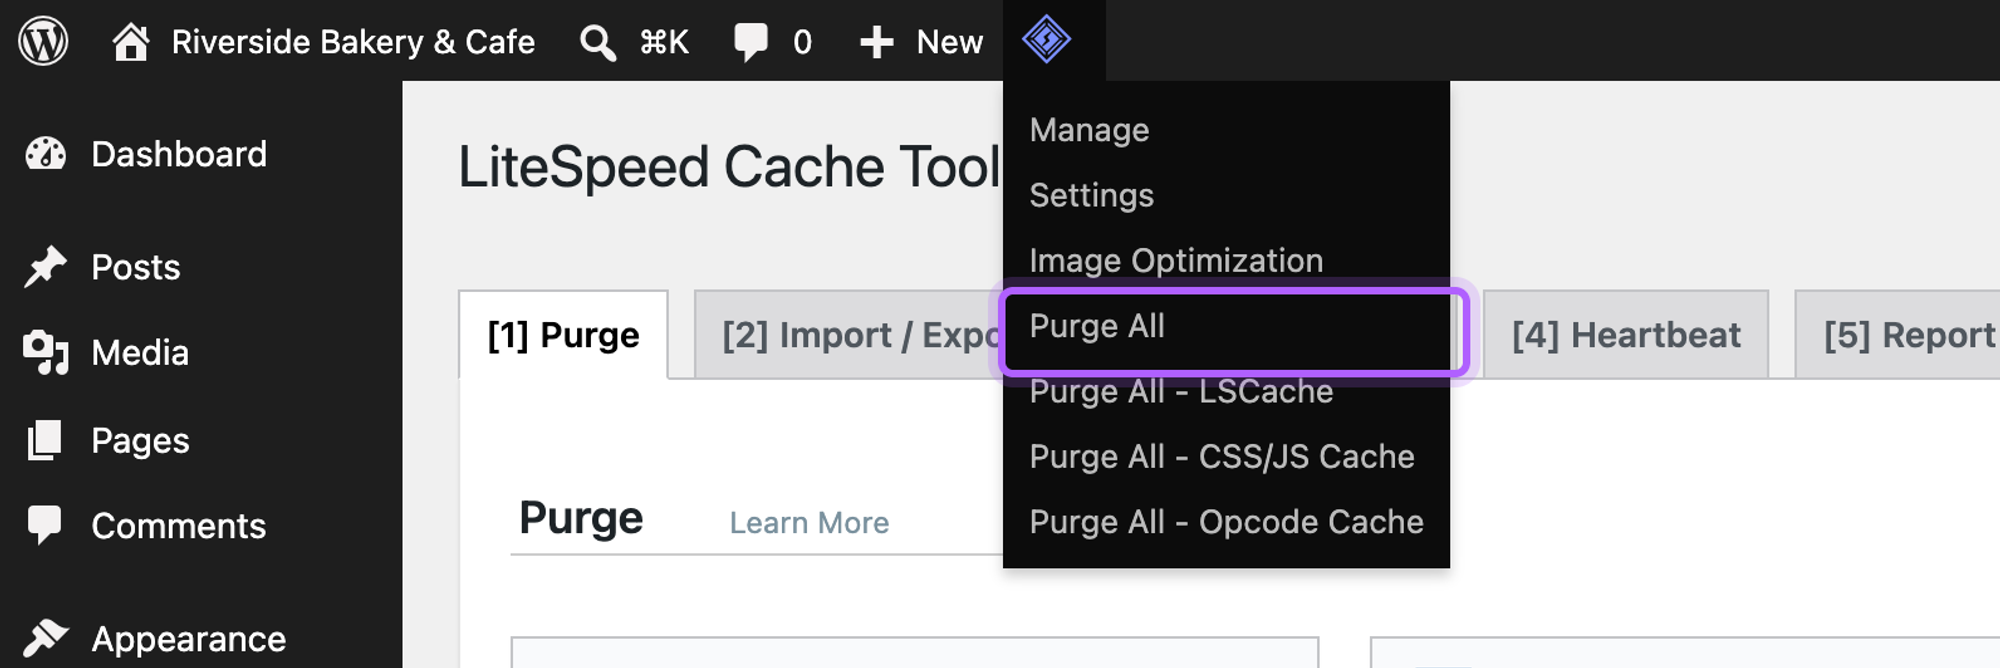
Hover over the LiteSpeed diamond icon in the admin bar and click Purge All.
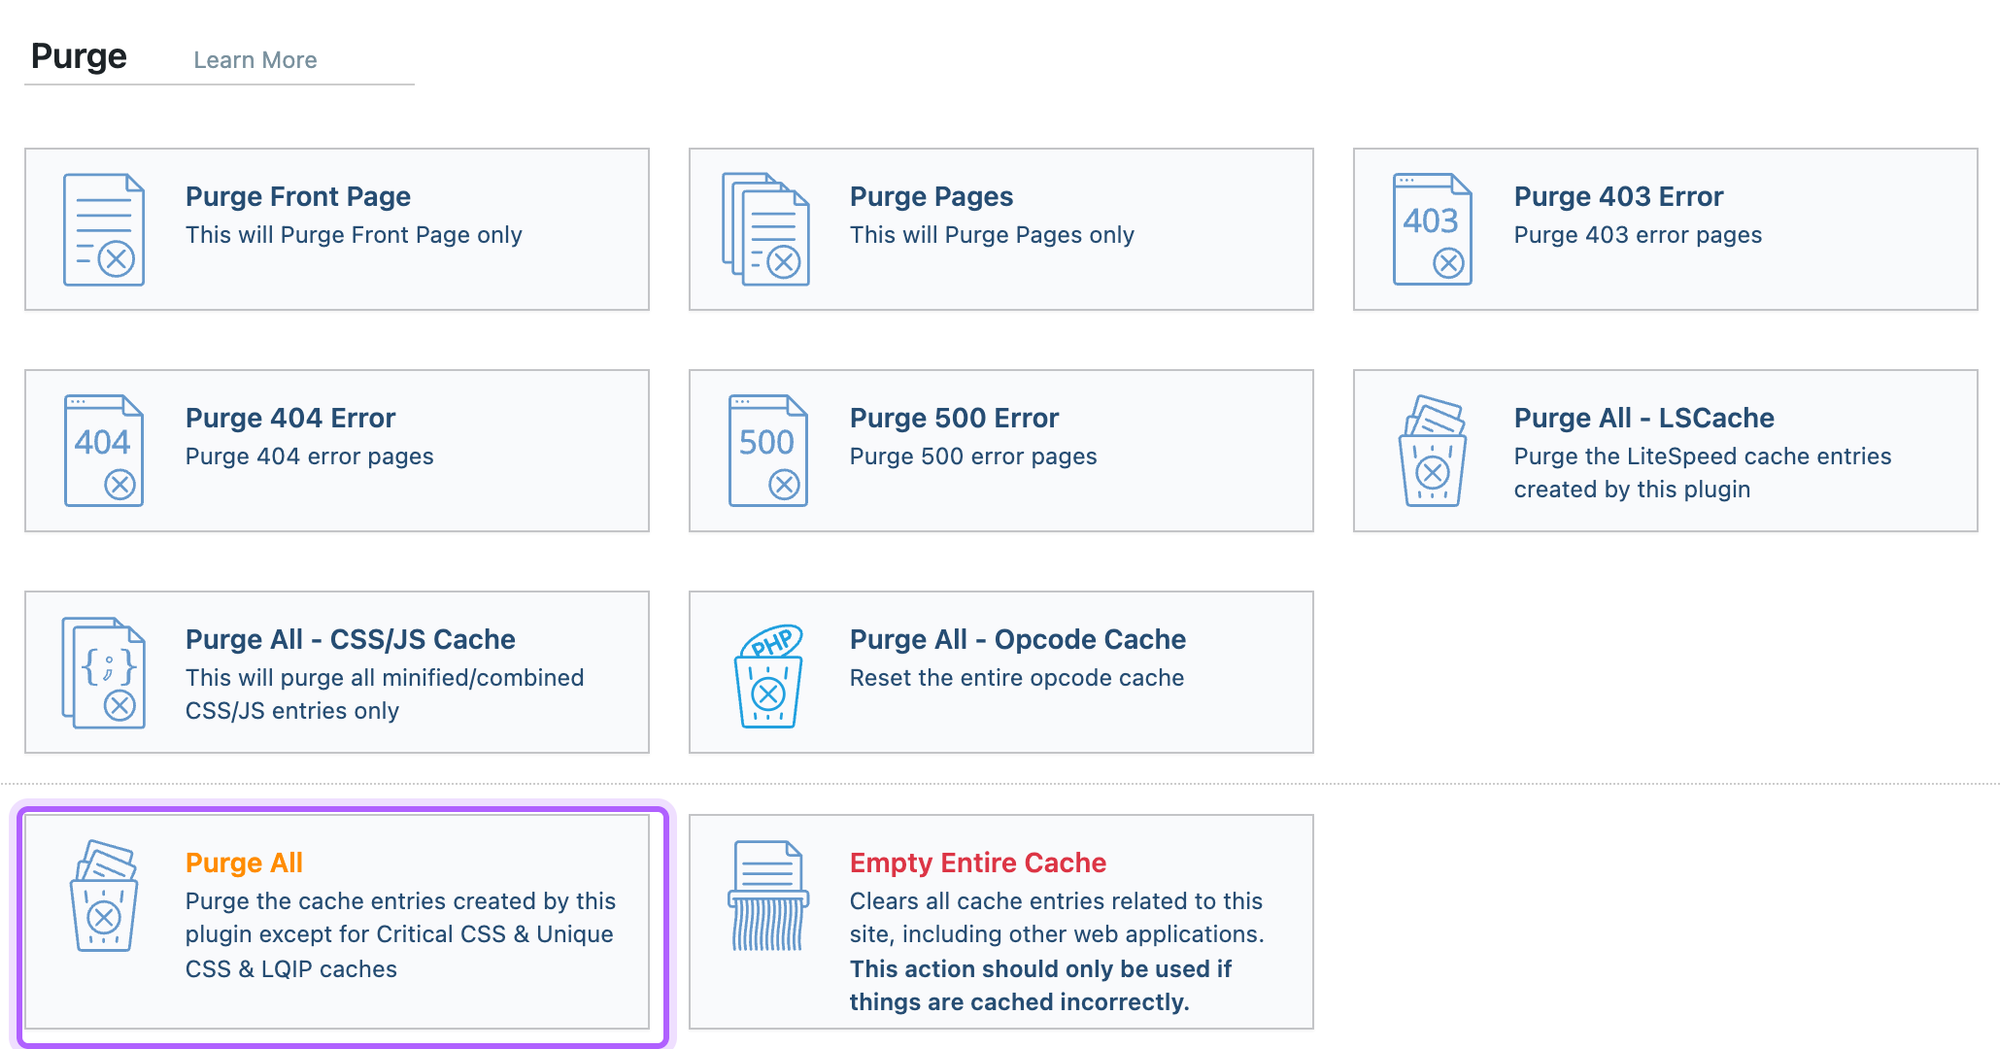
For more control, go to LiteSpeed Cache > Toolbox. The Purge tab lets you clear only the front page, only pages, or one of the other caches. Purge All clears everything the plugin created. Use Empty Entire Cache only when Purge All didn't help, because it also clears cache entries of other applications on the same server.
LiteSpeed Cache only caches pages when your host runs a LiteSpeed web server or you use QUIC.cloud.
Clear the cache in WP Fastest Cache
Hover over WP Fastest Cache in the admin bar and click Clear All Cache.

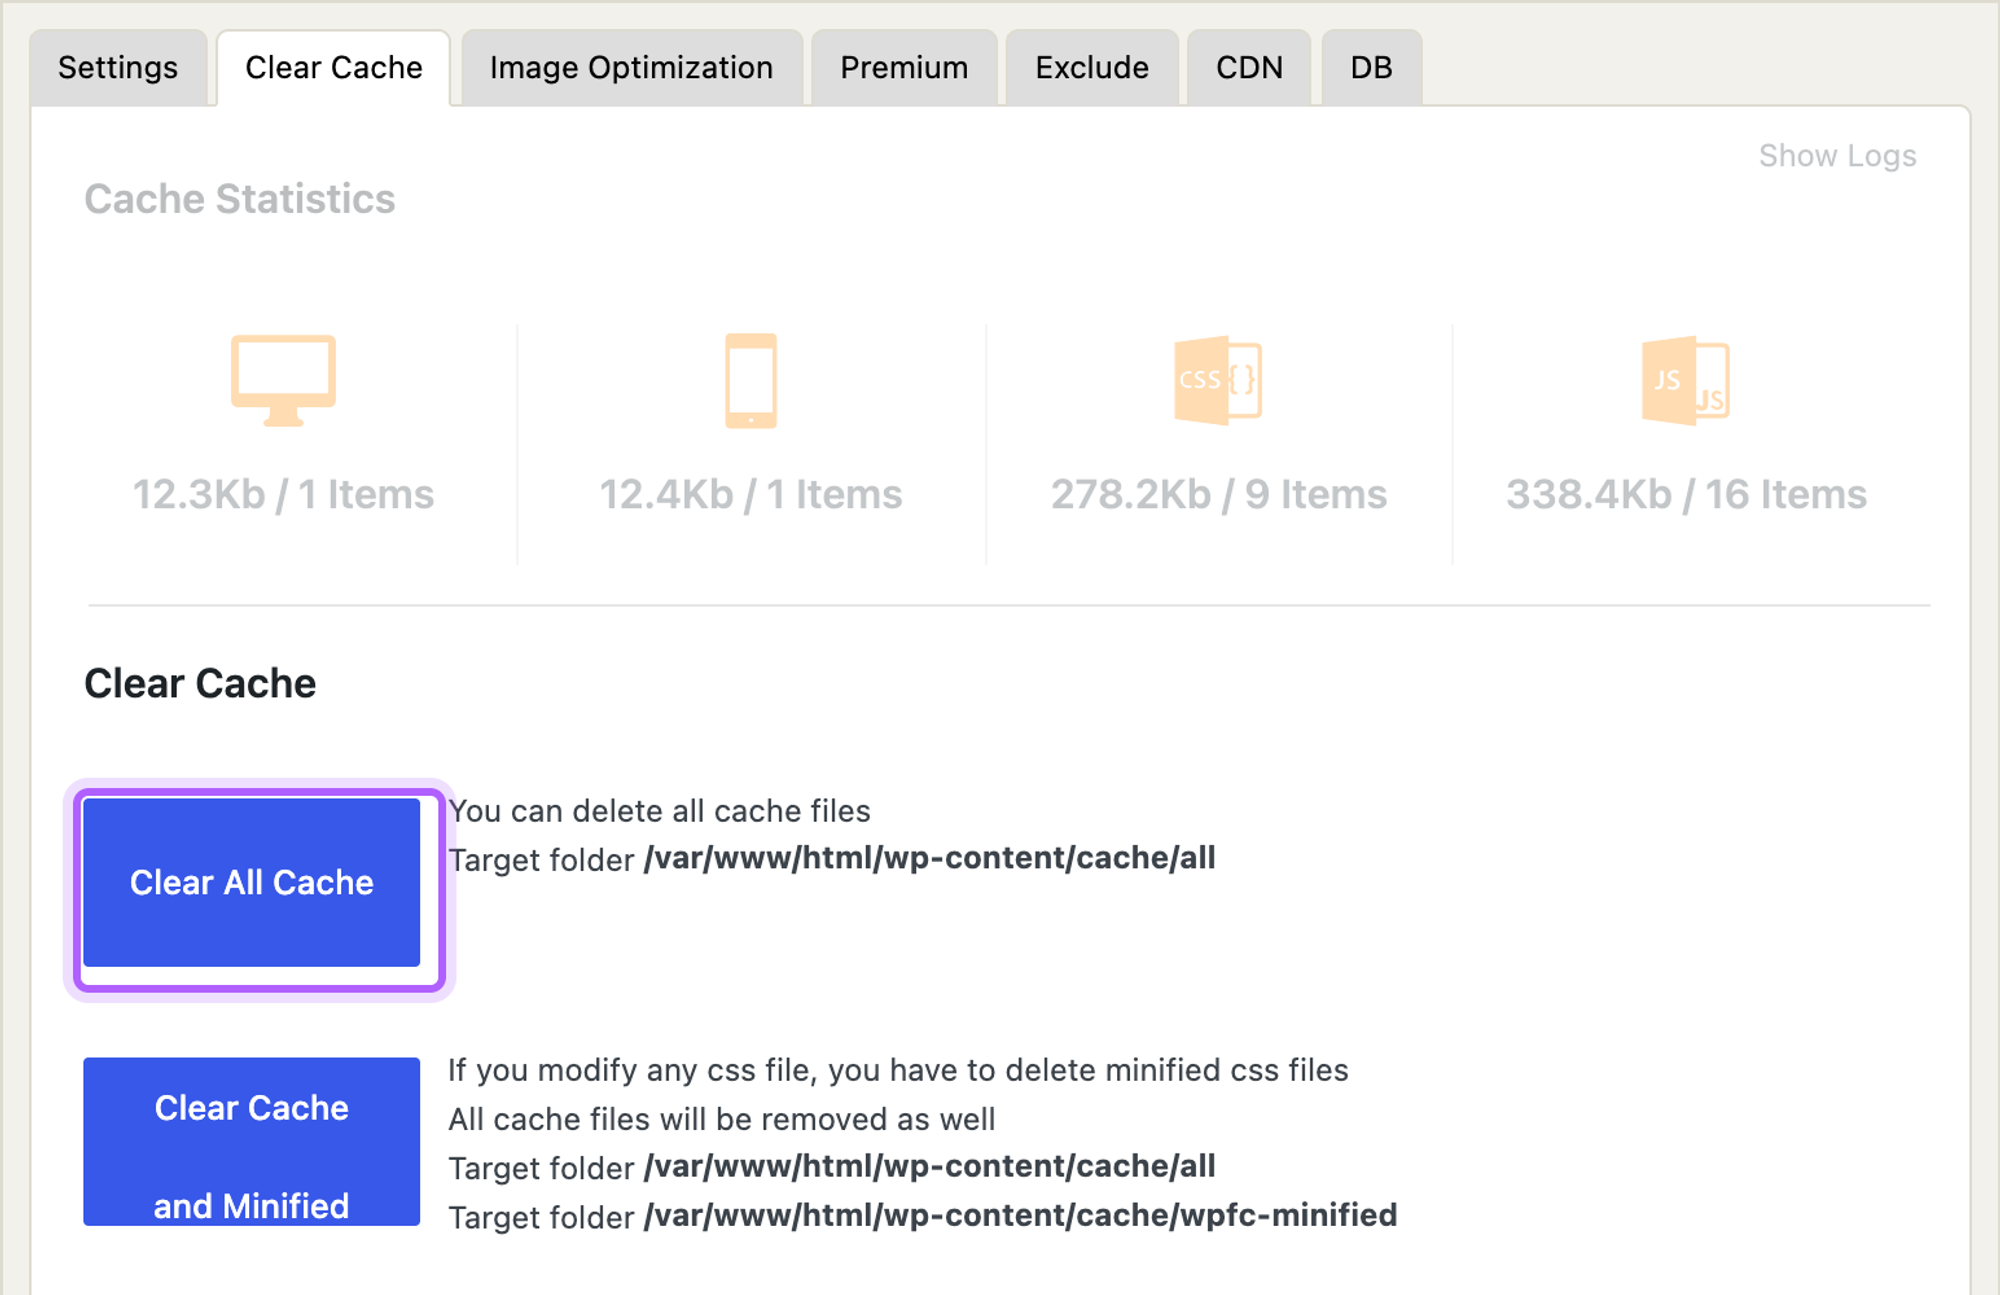
On the settings page under WP Fastest Cache, open the Clear Cache tab and click Clear All Cache. If you changed a CSS or JavaScript file, use Clear Cache and Minified instead, which also deletes the minified CSS and JavaScript files.
Other caching plugins
Almost every caching plugin puts a clear or purge link in the admin bar, usually under the plugin's name or icon. If you don't see one, open the plugin's settings page and look for a button labelled clear, purge, flush or delete cache.
Clear your host's server cache
Many managed WordPress hosts run their own page cache on the server, in front of any plugin. Clearing your plugin's cache doesn't touch it. Look for a purge or flush cache button in your hosting dashboard. Some hosts also install a small plugin that adds that button to the WordPress admin bar.
Clear the Cloudflare cache
If your site runs through Cloudflare, it can keep serving an older copy of your pages and files after you've cleared everything in WordPress.
- Log in to the Cloudflare dashboard and select your domain.
- Go to Caching > Configuration.
- Under Purge Cache, click Purge Everything, then confirm with Purge Everything again.
On a busy site, purging everything sends every request to your server until Cloudflare has cached the pages again. If only one page is wrong, the Custom Purge option lets you clear that URL alone.
Clear your browser cache
Your browser keeps copies of images, CSS and JavaScript files. A hard reload fetches the page again without them:
- Chrome, Edge and Firefox on Windows: Ctrl + Shift + R or Ctrl + F5
- Chrome, Edge and Firefox on Mac: Cmd + Shift + R
- Safari: Cmd + Option + R
If the page looks right after a hard reload but not in a normal tab, only your browser was showing the old version, and visitors already see the new one.
Clear the cache with WP-CLI
If you manage the site from the command line, each plugin except WP Super Cache ships its own WP-CLI command. WP Super Cache has none, but you can call its PHP function through wp eval.
1# WP Super Cache
2wp eval 'wp_cache_clear_cache();'
3
4# W3 Total Cache
5wp w3-total-cache flush all
6
7# LiteSpeed Cache
8wp litespeed-purge all
9
10# WP Fastest Cache
11wp fastest-cache clear all
12
13# Object cache (Redis, Memcached or the default in-memory cache)
14wp cache flushwp cache flush only clears the object cache. It doesn't delete the HTML files a page caching plugin has saved, so run the plugin's own command as well.
Clear the cache from your own code
When your own code changes something the caching plugin doesn't watch, you can clear the cache from PHP. Save this file as wp-content/mu-plugins/clear-all-caches.php. It calls the purge function of whichever of the four plugins is active, and clears the cache whenever the site title or tagline changes.
1<?php
2/**
3 * Plugin Name: Clear All Caches
4 * Description: Clears the page cache of whichever caching plugin is active.
5 */
6
7function my_clear_all_caches() {
8    if ( function_exists( 'wp_cache_clear_cache' ) ) {
9        wp_cache_clear_cache(); // WP Super Cache
10    }
11    if ( function_exists( 'w3tc_flush_all' ) ) {
12        w3tc_flush_all(); // W3 Total Cache
13    }
14    if ( function_exists( 'wpfc_clear_all_cache' ) ) {
15        wpfc_clear_all_cache(); // WP Fastest Cache
16    }
17    // LiteSpeed Cache. The action does nothing when the plugin is inactive.
18    do_action( 'litespeed_purge_all' );
19    wp_cache_flush(); // Object cache
20}
21
22// Clear the cache whenever the site title or tagline changes.
23add_action( 'update_option_blogname', 'my_clear_all_caches' );
24add_action( 'update_option_blogdescription', 'my_clear_all_caches' );
We tested the file on the same install. Without it, a site title change left visitors on the old title with WP Super Cache, W3 Total Cache and WP Fastest Cache. With it, the new title showed on the next visit. The LiteSpeed line uses the litespeed_purge_all action from the plugin's API.
You can call my_clear_all_caches() from anywhere in your own code, for example after an import script has updated a batch of pages. If you're new to creating content from code, see how to programmatically create a WordPress post.
Clearing the cache after generating pages with LPagery
When you create or update pages with the Bulk Page Generator, each page is saved as a normal WordPress page, so caching plugins treat it like any page you published by hand. In Live Mode, saving your template page also purges the page cache of WP Rocket, LiteSpeed Cache, W3 Total Cache and WP Super Cache for the affected pages.
Other caches aren't cleared automatically. If you use WP Fastest Cache, a host cache or Cloudflare, clear those after a template change using the steps above.
My changes still don't show after clearing the cache
Open the page in a private browser window first. If it looks right there, the old version was only in your browser. If it still looks wrong, clear the next layer out: your host's cache, then Cloudflare. If nothing helps, check that you edited the right page and that the change was saved, for example by looking at the page while logged in.
I've worked in SEO for more than ten years and helped over 100 businesses rank higher, mostly local businesses, e-commerce stores and SaaS companies. As co-founder of LPagery I work on local SEO, programmatic SEO and AI search visibility, and I test the strategies in these articles on our own sites and with our customers.